
Bass sound design
How to turn audio into bass with BASSENGER
Audio-driven bass processing uses the incoming sound to excite or shape generated bass. Start with a source that has clear attacks and gaps, set the generated pitch deliberately, then adjust how the processor reacts to the source's changing level.
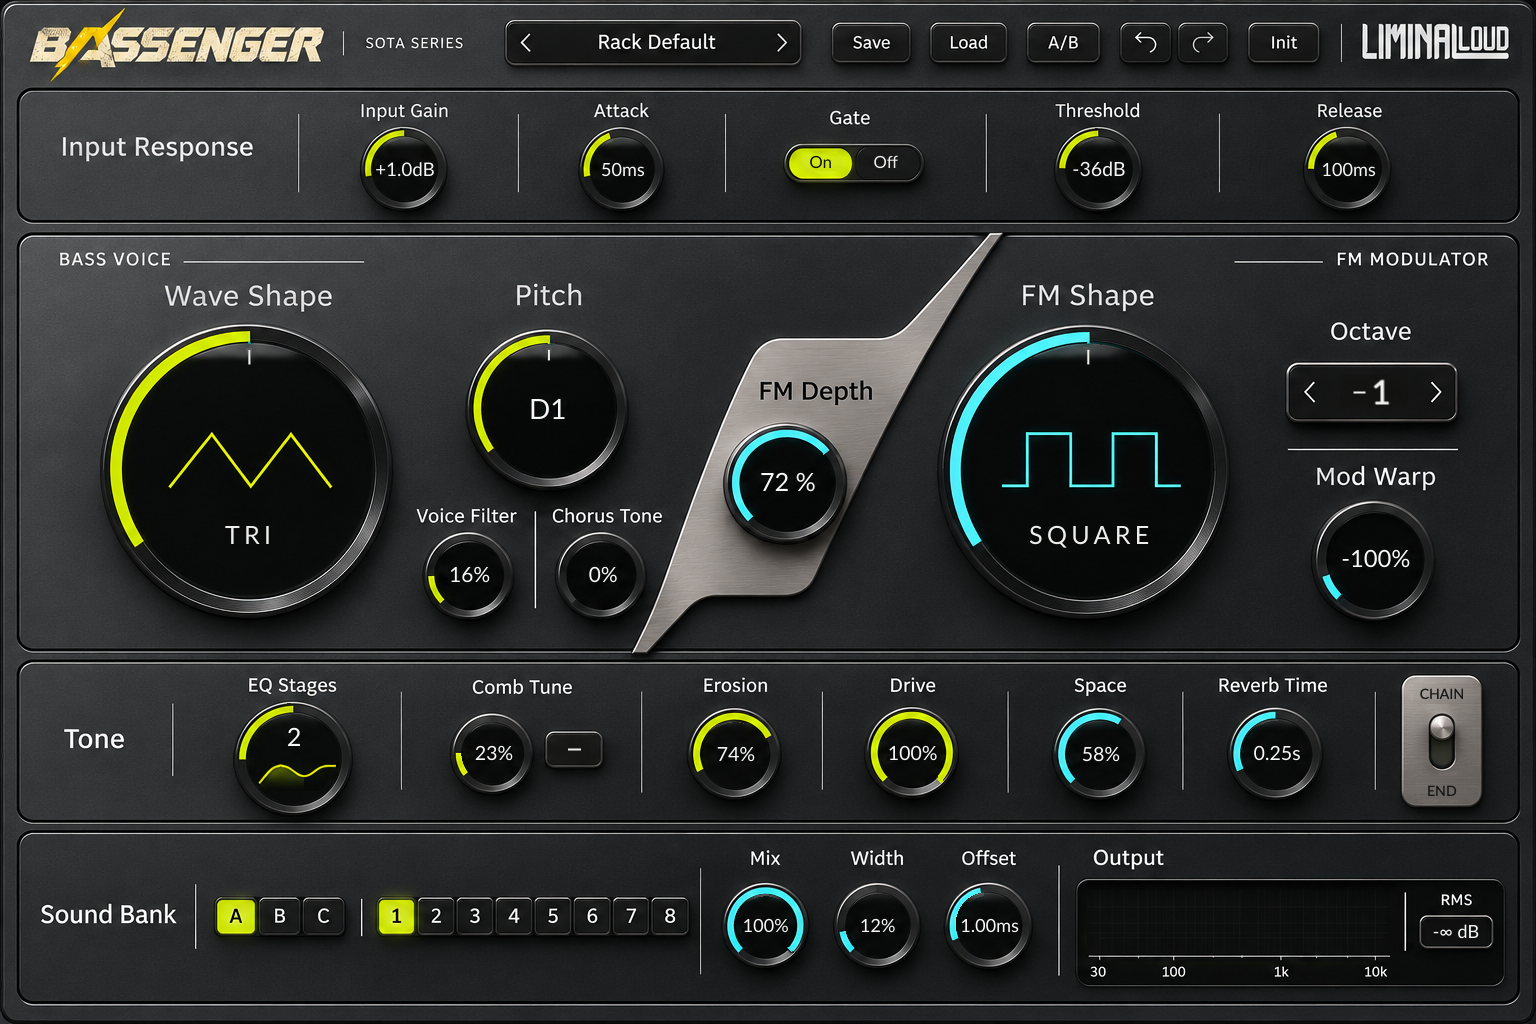
BASSENGER combines generated voices, FM, tone shaping and space around an incoming audio signal. Its current version uses manual or automated Pitch. It does not follow the source's musical pitch or accept MIDI notes.
Start with a short, readable source
Try a vocal chop, a percussion phrase or a short loop with a few distinct attacks. Listen for quiet tails between the accents. Those tails can keep an audio follower active even when the phrase appears to have stopped on the arrangement grid.
For a first comparison, use a source with one clear role. A full drum loop makes it harder to hear whether the kick, hats or background noise are driving the result. Save the busier material for a second pass after you understand the response.
Separate note choice from envelope response
- Feed audio into BASSENGER. Confirm Input Gain is above its MUTE endpoint and raise Mix enough to hear generated bass.
- Set Pitch. Choose the generated note against the track's bass or chord reference. Automate Pitch when the part needs different notes.
- Check Gate. If quiet tails hold the sound open, enable Gate and raise Threshold until the intended gaps become clear.
- Adjust Release. Let the end of each generated phrase fit the space before the next hit.
- Adjust Attack. Increase it if the front edge is too abrupt, then compare how much definition remains.
FM Octave changes the modulator's register. Use the main Pitch control when the entire generated bass needs a different note. A rhythmic loop also does not become an internal sequence: the incoming waveform must create the changes that the follower reacts to.
Build the voice in stages
Choose the carrier shape first, then add FM Depth. Compare the FM shapes before increasing drive or erosion. This makes it easier to identify which control introduced a metallic edge, a dense center or an unwanted high-frequency texture.
When trying Mod Warp, use Sine, Saw or Tri with audible FM Depth. The Square FM shape is unaffected by that warp. Change one stage at a time, keeping a version of the sound available for comparison.
Mix affects both the blend and the existing follower sensitivity. Its zero position uses the conditioned source-side path and is not equivalent to host bypass. Compare the actual bypassed plugin separately when assessing the total change.
Arrange variations with the Sound Bank
BASSENGER retains 24 sound variations in three banks of eight. Make one focused sound, choose another slot for a response, then return to check the first. Slot changes suit deliberate call-and-response edits in the DAW.
Pitch, input response, Mix and imaging remain global across slots. Keep that in mind when editing an envelope to suit a single variation: another slot may now react differently to the same source. Save a complete preset when the overall setup is working.
Check the low end in the arrangement
Bring the kick back in, reduce the listening level and compare the combined rhythm. Increase Width only while the bass keeps the center it needs. Offset is a short imaging delay, rather than a tempo echo; check the mono sum after changing it.
The output display is a spectrum, and RMS is a signal-level reading. Use the host's meters and track gain for the final level. If the phrase needs vowel articulation, try the talking-bass workflow after establishing the bass voice.