
Stereo width
How to widen synths and check mono compatibility
To widen a synth, add stereo processing to the layer that needs space, compare it at the same loudness, and check the result in mono. A wider image is useful only if the part still has the tone and weight you need when the channels are combined.
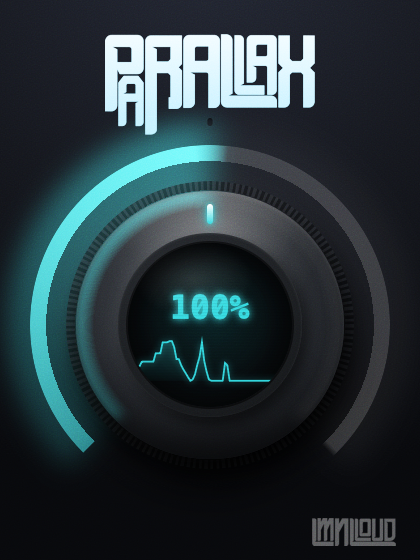
This walkthrough uses PARALLAX, a free stereo widener from Liminal Loud. Its single Amount control blends a short channel-delay effect into the signal. The listening checks also apply when you use a different widener.
Choose the layer that needs width
Start with a pad, a sustained synth, or the upper layer of a bass sound. Leave the kick and sub on their own tracks while you make the decision. That gives you a clear comparison: the wide layer can change without moving the foundation of the mix.
If the patch already contains chorus, unison or stereo reverb, listen before adding another processor. It may already have enough spread. A useful change might be a quieter center layer, a different pan position or less reverb on a competing part.
Set PARALLAX Amount before judging the level
- Insert PARALLAX on a stereo track. Use a phrase with held notes and attacks so you can hear both the body and the start of the sound.
- Turn Amount to 0% for the dry reference. Move toward 25%, then 50%, while listening in the mix.
- Compare with 100%. This is the fully processed signal. The native default is 100%, so returning the knob to its default does not bypass the effect.
- Match the listening level. Adjust a gain control after the plugin before deciding whether the change helps.
PARALLAX blends dry and processed sound between 0% and 100%. Above 100%, the signal remains fully processed and the control adds output gain, reaching +6 dB at 200%. Turning it from 100% to 200% does not double its delay time or add a second width mode.
Check mono compatibility with the whole phrase
Place a mono utility after the widener. Switch between stereo and mono while the phrase loops. Listen for a hollow tone, a quieter fundamental or a lead that loses its place in the mix. Compare against the dry signal in mono as well; an already-wide source can have its own cancellation problems.
In Ableton Live, use Utility's Mono switch for this check. Ableton's Utility reference explains its mono and width controls.
If the processed part gets too thin, reduce Amount within the 0–100% blend range. You can also move the widener to a supporting layer and keep the main melody or bass center dry. Listen to the full phrase after each change; a setting that works on one note may color another differently.
Know what this widener changes
PARALLAX uses two identical parallel branches with a 0.10 ms delay on the right channel; the left channel stays undelayed. That timing difference changes the relationship between the channels. It can also change the tone when they are summed.
Its small spectrum display shows a qualitative view of the output mono sum. Use your DAW's meters and mono monitoring to assess level and compatibility. The glowing Amount ring shows the knob setting.
Keep the setting that survives the mix
Make the final choice with the drums, bass and lead playing together. Check speakers as well as headphones when available. A small amount of extra space can be more useful than the widest soloed sound, especially when the arrangement already contains wide reverbs and effects.
If the stereo version improves and the mono version still keeps the part's role, save the setting with the session. If the mix loses focus, return to the dry reference and try widening a different layer.